The quick answer
JPEG to SVG conversion traces the colored regions of a pixel image into vector paths. Upload a clear JPEG, choose a small palette, preview the traced edges, and download the SVG. Changing a filename alone does not create vectors.
JPG to SVG with color: what matters
Color tracing groups pixels into a limited palette. A six-color trace can preserve a flat illustration while avoiding many nearly identical regions from compression artifacts.
Increase the palette only when the additional shade represents a useful part of the artwork. Check actual brand colors in an editor after tracing.
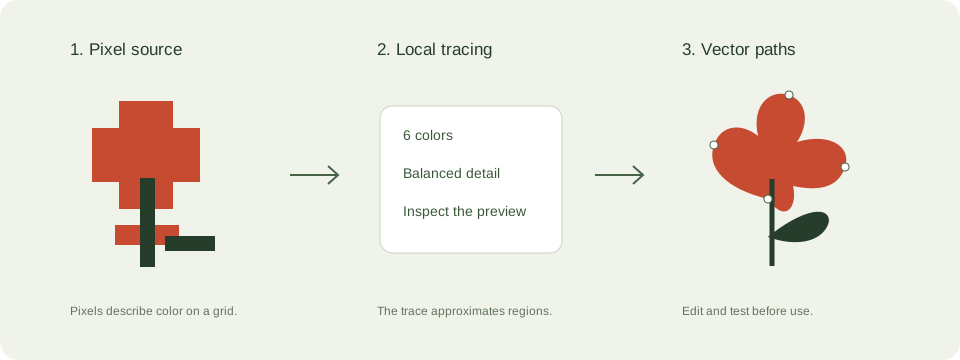
A practical jpeg to svg workflow
- Crop around the artwork. A large empty background takes processing time without improving the drawing. Avoid a heavily compressed screenshot if an original image is available.
- Choose 6 colors for simple artwork or 2 colors for a silhouette. Increase the palette only when extra shades carry useful detail.
- Trace and compare the original with the vector preview. Look closely at lettering, holes, thin strokes, and corners.
- Download the SVG and open it in the destination software. Set the final dimensions there and inspect it again.
Check these details before you export
- This converter generates paths rather than wrapping the original raster image in an SVG container.
- Scaling a vector avoids new pixelation, but tracing cannot recover details absent from the source.
- Traced text becomes outlines. Rebuild it in an editor if you need editable font-based text.
Where this workflow stops
Photographs, gradients, hair, and noisy textures can produce thousands of regions. For a photo on a website, JPEG or WebP is usually more practical.
For a first local trace, use the JPEG to SVG converter. If you are working with transparent artwork, read the PNG transparency guide. Keep an original file so you can compare your changes.
Reference and further reading
MDN: SVG graphics provides background for this workflow. Platform requirements and editor features can change; check the current instructions for your destination.
Written for JPEGtoSVG by Shahab Uddin. These guides describe practical checks and limitations; they do not promise lossless tracing or automatic machine-ready output.