The quick answer
SVG is a drawing format rather than a machine program. Trace and edit your artwork, then use your cutter, engraver, CNC, embroidery, or 3D software to create the production instructions.
Convert image to SVG for engraving: what matters
An engraver may process a raster photo, filled vector regions, and outline paths differently. Choose the representation required by the engraving mode rather than assuming every image should be traced.
For flat artwork, limit colors and inspect the fill boundaries. Use the engraver’s software to configure operations and preview how the regions will be processed.
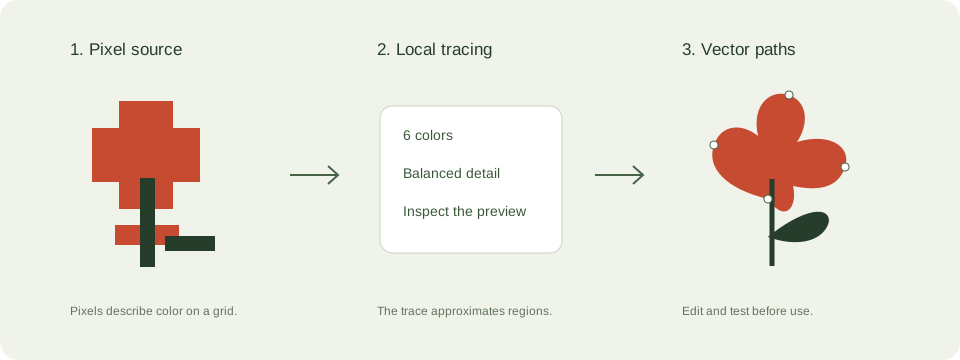
A practical svg for fabrication workflow
- Define physical dimensions and start with simple artwork. A clean silhouette is easier to inspect than a shaded photograph.
- Check closed contours, duplicate regions, isolated shapes, and scale in a vector editor. The local tracer makes filled regions rather than calibrated toolpaths.
- Import into machine-specific software and set the required materials and production settings there.
- Run a preview or simulation and a small test on appropriate material before a full job.
Check these details before you export
- Laser cutting and engraving interpret outlines and fills differently.
- Embroidery needs digitized stitches in a supported format such as PES or DST. An SVG is not a stitch file.
- 3D printing requires a mesh and slicing. A flat SVG can provide an extrusion profile but is not an STL or G-code file.
Where this workflow stops
No machine settings, toolpaths, stitch files, meshes, or machine safety validation are generated here.
For a first local trace, use the JPEG to SVG converter. If you are working with transparent artwork, read the PNG transparency guide. Keep an original file so you can compare your changes.
Reference and further reading
Inkscape: vector editing tutorials provides background for this workflow. Platform requirements and editor features can change; check the current instructions for your destination.
Written for JPEGtoSVG by Shahab Uddin. These guides describe practical checks and limitations; they do not promise lossless tracing or automatic machine-ready output.